Part – 1
In this post, we will see how to set up Spring boot and Angular for Blog using Spring boot projects.
Setup Spring boot Project
First, we will generate our Springboot project by going to the Spring Initializr website at https://start.spring.io/
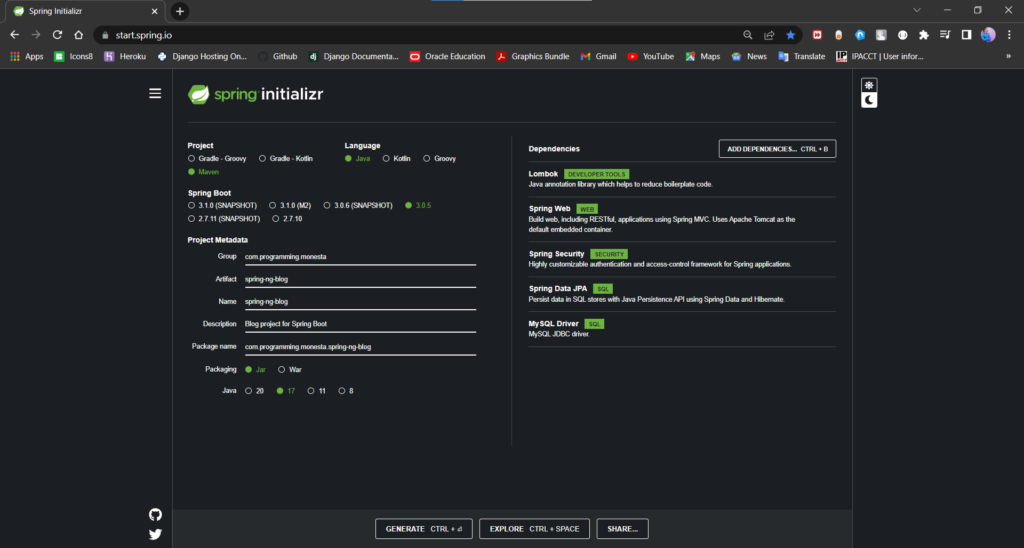
Fill out the following details inside the Spring Initializr website:
- Project – Maven Project
- Language – Java
- Spring Boot – 3.0.5 (use default version)
Under Project Metadata, provide the below information:
- Group – com.programming.techbanda
- Artifact – spring-ng-blog
Under dependencies, we will use the following dependencies, so either you can search manually for those dependencies or pick them.
- Lombok
- Spring Web Starter
- Spring Security
- MySQL Driver
- Spring Data JPA
Once everything is selected, click on Generate Project, and the project should be downloaded to your machine. You can refer the below image if you have any doubts on how to configure the Spring Initializr.
I will be using IntelliJ IDEA as the IDE in this post, you can download the free community edition at this link – https://www.jetbrains.com/idea/download/#section=windows
Once you download and install, open IntelliJ and you will see a welcome screen like below:
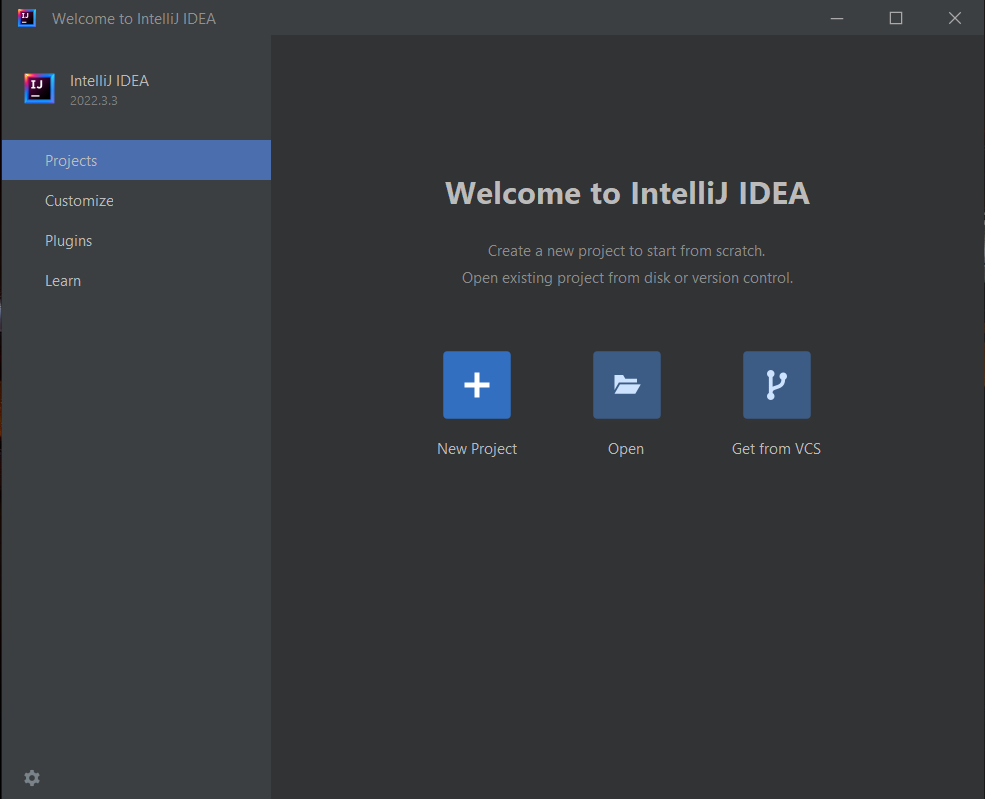
Click on Open, and browse through the folders and select the pom.xml file of the downloaded project and click on OK.
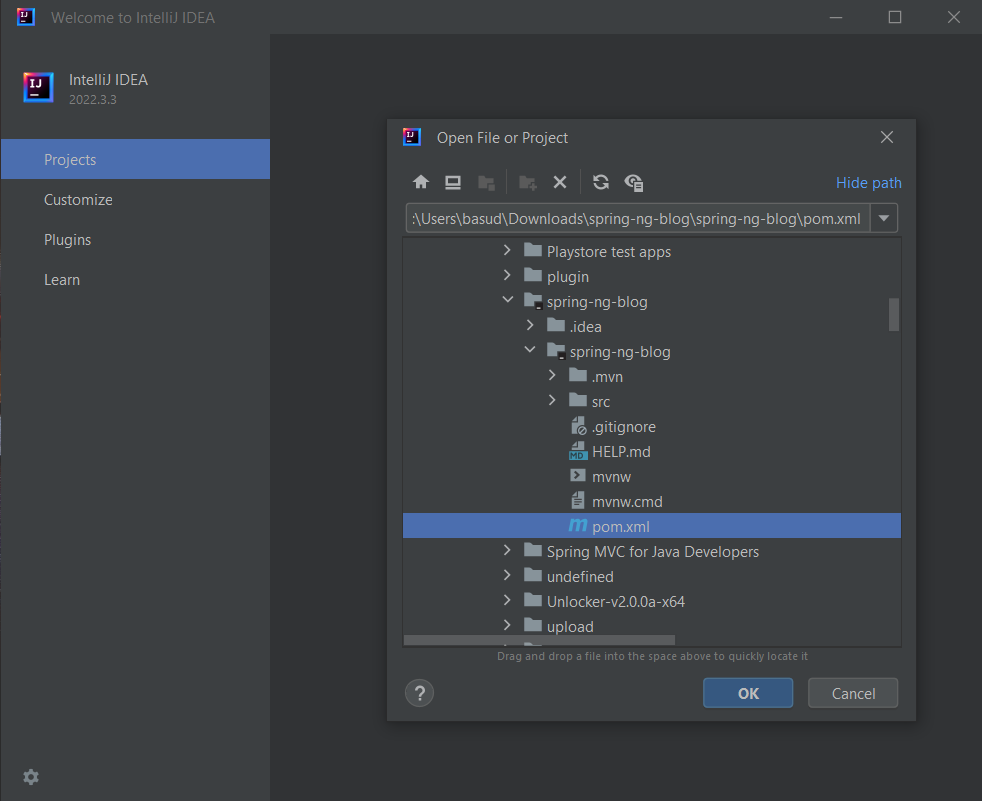
Browse to the downloaded project, select pom.xml and click on OK
Now you will see a popup box, asking us to Open as Project or Open as File. Select Open as Project, this should open the IntelliJ project window. As soon as you open the project, IntelliJ will try to resolve the project dependencies and build the source code, this usually takes less than a minute.
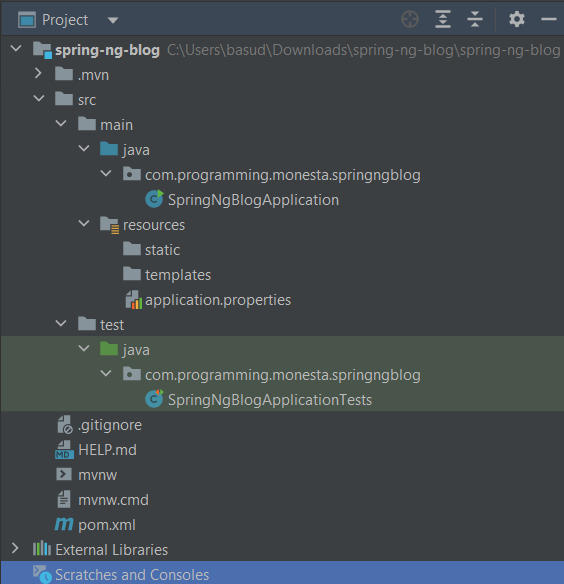
Project Structure
As we are using maven as our Blog using Spring boot build and project management tool, this is how our project structure looks like:
Set up MySQL Database
Make sure you download and install the MySQL database and MySQL Workbench from the below links:
Once you have installed both, open the MySQL workbench and connect to the local database, after that let’s create a schema called with the name – ngspringblog.
You can do that, by right-clicking on the MySQL workbench Schema screen and click on Create Schema. After that, you can type in the schema name and click on the Apply button.
Configure Database, Hibernate & JPA in our project
Inside the path src/main/resources/application.properties, add the following configuration for our Database and JPA/Hibernate.
## Spring Datasource Configuration
spring.datasource.url=jdbc:mysql://localhost:3306/ngspringblog?useSSL=false&serverTimezone=UTC&useLegacyDatetimeCode=false
spring.datasource.username=root
spring.datasource.password=mysql

## JPA Hibernate Properties
spring.jpa.properties.hibernate.dialect=org.hibernate.dialect.MySQL5InnoDBDialect
spring.jpa.hibernate.ddl-auto=update
Create Domain Entities in our project
Now its time to create the entities for our blog application, the first step would be to create a package called model inside the com.programming.techbanda package. Inside the model package, create two classes called Post.java which stores our blog post information and User.java which stores the details of our users.
Here is the code for Post.java:
package com.programming.techbanda.springngblog.Model;

import javax.persistence.*;
import javax.validation.constraints.NotBlank;
import javax.validation.constraints.NotEmpty;
import java.time.Instant;

@Entity
@Table
public class Post {
    @Id
    @GeneratedValue(strategy = GenerationType.IDENTITY)
    private Long id;
    @NotBlank
    @Column
    private String title;
    @Lob
    @Column
    @NotEmpty
    private String content;
    @Column
    private Instant createdOn;
    @Column
    private Instant updatedOn;
    @Column
    @NotBlank
    private String username;

    public Long getId() {
        return id;
    }

    public void setId(Long id) {
        this.id = id;
    }

    public String getTitle() {
        return title;
    }

    public void setTitle(String title) {
        this.title = title;
    }

    public String getContent() {
        return content;
    }

    public void setContent(String content) {
        this.content = content;
    }

    public Instant getCreatedOn() {
        return createdOn;
    }

    public void setCreatedOn(Instant createdOn) {
        this.createdOn = createdOn;
    }

    public Instant getUpdatedOn() {
        return updatedOn;
    }

    public void setUpdatedOn(Instant updatedOn) {
        this.updatedOn = updatedOn;
    }

    public String getUsername() {
        return username;
    }

    public void setUsername(String username) {
        this.username = username;
    }
}
All the fields inside the Post class are self-explanatory. We have @Lob annotation for our content field as it contains HTML code which may also include images.
And also the code for User.java
package com.programming.techbanda.springngblog.Model;

import javax.persistence.*;

@Entity
@Table
public class User {
    @Id
    @GeneratedValue(strategy = GenerationType.IDENTITY)
    private Long id;
    @Column
    private String userName;
    @Column
    private String password;
    @Column
    private String email;

    public Long getId() {
        return id;
    }

    public void setId(Long id) {
        this.id = id;
    }

    public String getUserName() {
        return userName;
    }

    public void setUserName(String userName) {
        this.userName = userName;
    }

    public String getPassword() {
        return password;
    }

    public void setPassword(String password) {
        this.password = password;
    }

    public String getEmail() {
        return email;
    }

    public void setEmail(String email) {
        this.email = email;
    }
}
Create Repositories for our Post and User classes
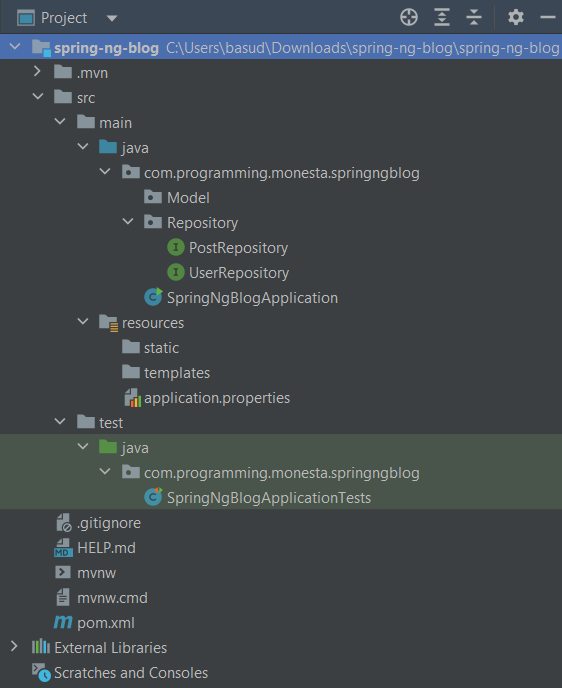
Now let’s create the Repository interfaces for our Post and User domain classes. The Repositories are responsible to save the domain objects into the database.
We will create a separate package called com.programming.techie.repository to store our Repository Interfaces.
1. PostRepository.java
package com.programming.techbanda.springngblog.Repository;

import com.programming.techie.springngblog.Model.Post;
import org.springframework.data.jpa.repository.JpaRepository;
import org.springframework.stereotype.Repository;

@Repository
public interface PostRepository extends JpaRepository<Post, Long> {
}
The PostRepository is an interface that extends the Spring Data’s JpaRepository.
2. UserRepository.java
package com.programming.techbanda.springngblog.Repository;

import com.programming.techie.springngblog.Model.User;
import org.springframework.data.jpa.repository.JpaRepository;
import org.springframework.stereotype.Repository;

import java.util.Optional;

@Repository
public interface UserRepository extends JpaRepository<User, Long> {

    Optional<User> findByUserName(String username);
}
The UserRepository is also an interface that extends the JpaRepository. This interface contains a method definition to retrieve the User by the username.
Revisiting the Project Structure
So let’s will have a look at the project structure again, this is how it should look like:
Running the Application
You can try to run the Blog using Spring boot application by going inside the SpringNgBlogApplication.java class and then Right-click -> Run SpringNgBlogApplication.main(). Or you can also run the following command:
mvn spring-boot:runYou should see the following log messages:
2023-03-27 19:12:37.247  INFO 17732 --- [           main] o.s.b.w.embedded.tomcat.TomcatWebServer  : Tomcat started on port(s): 8080 (http) with context path ''
2023-03-27 19:12:37.247  INFO 17732 --- [           main] c.p.t.s.SpringNgBlogApplication          : Started SpringNgBlogApplication in 3.773 seconds (JVM running for 4.118)
What’s Next?
In the next post, we will see how to configure Spring Security in our application. This allows us to implement Signup and Login functionalities.
